Your countertop flosser’s pressure settings matter because they determine how effectively you clean your teeth and gums without causing discomfort or damage. Using the right level helps remove plaque and debris while protecting sensitive tissues. Starting with low and increasing gradually ensures a safe, personalized routine. If you keep these adjustments in mind, you’ll improve your oral health. Stick around to learn more about matching the perfect pressure to your needs.
Key Takeaways
- Proper pressure settings ensure effective plaque removal without causing gum irritation or discomfort.
- Adjusting pressure levels tailors the flossing experience to sensitive gums and dental needs.
- Incorrect settings can lead to ineffective cleaning or potential oral tissue damage.
- Regularly checking and maintaining device pressure preserves performance and prolongs device lifespan.
- Starting with low pressure and gradually increasing improves safety and comfort during use.

Aneebart Electric Toothbrush (Green + Pink)
2-Minute Smart Timer : The 2-minute smart timer provides an interval pause every 30 seconds, reminding you to...
As an affiliate, we earn on qualifying purchases.
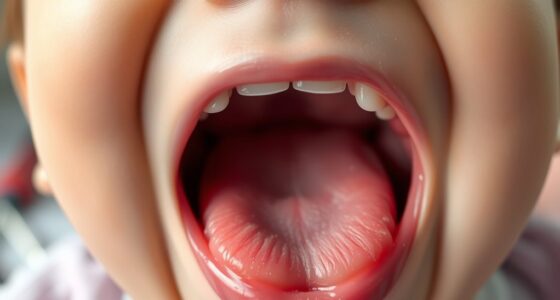
Why Pressure Settings Matter on Your Countertop Flosser
Pressure settings are essential because they directly impact how effectively your countertop flosser cleans your teeth and gums. Proper pressure allows you to remove plaque and food debris without causing discomfort or damage. When you choose the right setting, it supports good dental hygiene by reaching areas that brushing alone might miss. Maintaining ideal pressure also promotes better oral health, preventing gum disease and cavities. If the pressure is too high, it can irritate your gums or even cause bleeding. Conversely, too low may not clean thoroughly. By understanding and adjusting your pressure settings, you ensure your flossing routine is both safe and effective, giving you a healthier smile and better overall oral hygiene. Additionally, correct pressure usage can help prolong the lifespan of your device and make your cleaning routine more comfortable. Properly adjusting the pressure also helps avoid common issues like device damage, and understanding the importance of pressure regulation can enhance your overall experience and device durability. Being aware of safe pressure levels can further prevent discomfort and promote regular use of your flosser. Recognizing the significance of mammography guidelines in breast health underscores the importance of regular, well-regulated cleaning routines for overall wellness.

SEAGO Kids Electric Toothbrush with 2 Mins Brushing Timer and 4 Replacement Brush Heads, Rainbow LED Light Makes Brushing Fun, Boys Battery Powered Toothbrush for 4-12 Years Old,SG-977
Fun Kids Electric Toothbrush:The giraffe-patterned junior electric toothbrush and the rainbow led lights was design to give children...
As an affiliate, we earn on qualifying purchases.
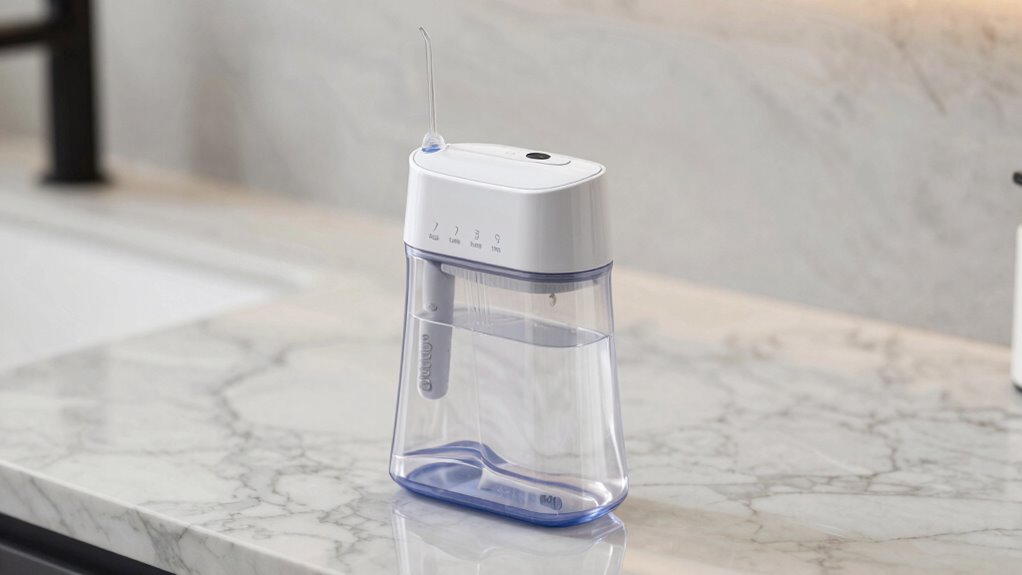
How to Know Your Flosser’s Pressure Options

Start by checking your device manual to understand the available pressure levels. Then, try adjusting the settings to find what’s comfortable for you. Keep an eye on indicator lights to confirm your selected pressure, ensuring you’re using the right amount of force. Incorporating biosensor feedback can help monitor your oral health response and optimize pressure settings further. Being aware of pressure variability in devices like countertop flossers can improve your overall oral hygiene experience.
Checking Device Manual
To determine your countertop flosser’s pressure options, the most reliable method is consulting the device’s manual. Manuals provide specific details on pressure levels, ensuring you don’t exceed safe limits that could compromise device durability or affect battery longevity. Look for sections on operation and settings. Some manuals include charts or diagrams to clarify pressure ranges. Here’s an example:
| Pressure Level | Recommended Use | Notes |
|---|---|---|
| Low | Sensitive gums | Save battery |
| Medium | Regular cleaning | Durable parts |
| High | Deep cleaning | Use with caution |
Always refer to your manual to avoid damaging the device or reducing its lifespan. Proper understanding of pressure options helps optimize performance without risking damage.
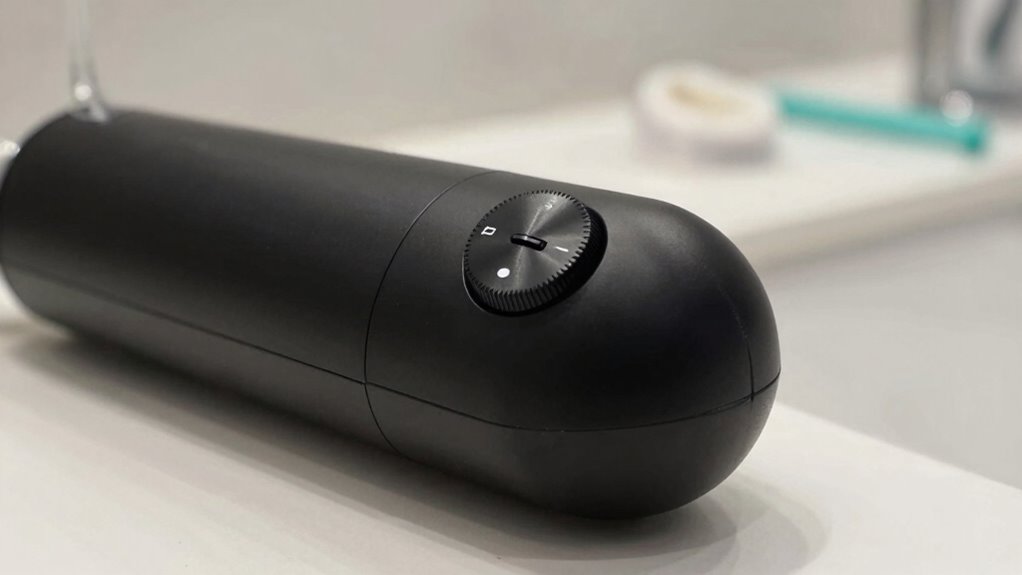
Adjusting Pressure Settings
Understanding your countertop flosser’s pressure settings is essential for safe and effective use. To adjust them properly, start by reviewing your device’s manual to identify the available options. Many flossers offer multiple pressure levels, from gentle to powerful, allowing you to customize your cleaning according to your dental hygiene needs. Begin with the lowest setting if you have sensitive gums or recent dental work, then gradually increase as needed. Pay attention to how the water pressure feels and avoid any discomfort. Properly modifying pressure ensures you remove plaque effectively without damaging your gums or enamel. Additionally, being aware of pressure settings helps prevent overuse that could cause irritation or damage, promoting a more comfortable and effective cleaning experience. Understanding pressure control mechanisms can further assist in achieving optimal results. Being mindful of your pressure preferences allows for a personalized and safe flossing routine. Regularly checking your device’s maintenance guidelines can also help maintain consistent pressure levels and ensure longevity. Maintaining awareness of body piercing care and proper hygiene can prevent infections during oral hygiene routines, supporting better overall health. Consistently using the right pressure contributes to better oral health, preventing irritation and supporting a healthier, cleaner smile.
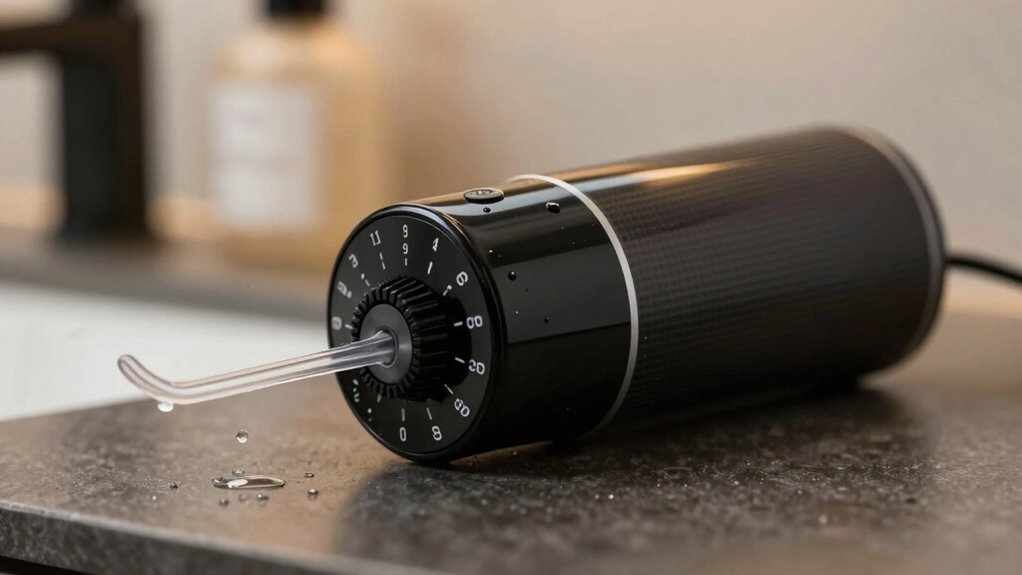
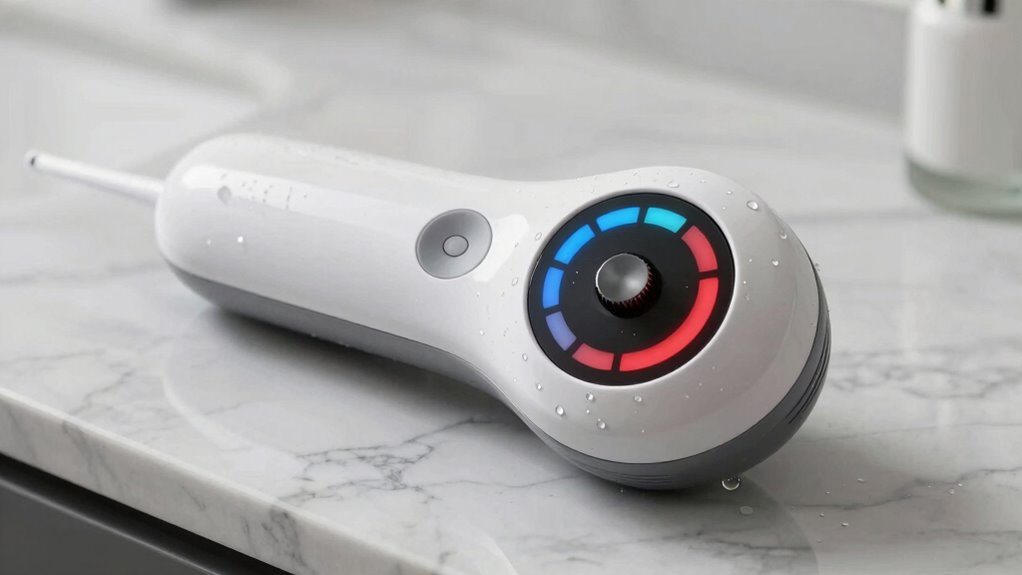
Recognizing Indicator Indicators
Most countertop flosser models feature visual or tactile indicators that help you identify the current pressure setting. These indicators are essential for maintaining proper dental hygiene and ensuring effective oral care. Many devices have color-coded lights, such as green for low pressure and red for high, allowing you to easily recognize your selected setting. Some models offer tactile feedback, like a click or vibration, confirming your adjustment without needing to look. Familiarizing yourself with these indicators helps you choose the right pressure for sensitive gums or thorough cleaning. Understanding pressure indicators can also help prevent overuse or discomfort during your routine. Additionally, being aware of pressure regulation ensures you can make precise adjustments tailored to your comfort level. Paying attention to how your flosser signals the current setting is crucial for safe and effective use, which can help you optimize your oral care routine and avoid discomfort or damage caused by improper pressure. Recognizing these indicators keeps your dental hygiene effective and safe.

Philips Sonicare for Kids 3+ Bluetooth Connected Rechargeable Electric Power Toothbrush, Interactive for Better Brushing, Turquoise, HX6321/02
Interactive free app educates and gets kids excited about brushing exciting rewards for successful brushing sessions
As an affiliate, we earn on qualifying purchases.
How to Adjust Pressure for Optimal Flossing Results

Adjusting the pressure on your countertop flosser is essential for a comfortable and effective flossing experience. This helps remove plaque without causing discomfort or damage to your gums. If you notice sensitivity or bleeding, lower the pressure; if your gums feel like they’re not getting clean enough, increase it slightly. Consistent pressure adjustments can improve your oral hygiene habits by making flossing less painful and more thorough. Regularly fine-tuning your settings will help maintain healthy gums and teeth over time. Understanding pressure settings can also help prevent overuse or injury during flossing. Being aware of the correct pressure levels ensures you optimize your flossing routine without risking gum irritation or damage. Proper pressure ensures you maximize benefits while protecting your sensitive tissues.

SEAGO Kids Electric Toothbrush with 2 Mins Brushing Timer and 4 Replacement Brush Heads, Rainbow LED Light Makes Brushing Fun, Boys Battery Powered Toothbrush for 4-12 Years Old,SG-977(Pink)
Kids sonic toothbrush handles use food-safe ABS and TPE. At the same time, the bristles of the toothbrush...
As an affiliate, we earn on qualifying purchases.
Finding the Best Pressure for Sensitive or Receding Gums
If you have sensitive or receding gums, finding the right pressure on your countertop flosser is essential to prevent discomfort or further damage. Start with a low setting and gradually increase until you find a comfortable, effective level. Your dietary habits and oral hygiene routines influence gum health, so gentle pressure helps avoid irritation. Use the table below as a guide:
| Pressure Level | Suitable For | Tips |
|---|---|---|
| Low | Sensitive gums | Use short, gentle bursts |
| Medium | Receding gums | Focus on thorough cleaning |
| High | Healthy gums | Use cautiously, if needed |
Additionally, understanding gum health can help you better tailor your flossing routine. Recognizing how nutritional choices impact oral health can further support your efforts to maintain healthy gums. Being aware of pressure settings can also prevent unnecessary gum irritation and promote overall oral well-being. Regularly monitoring your oral hygiene practices ensures your efforts align with your gum health needs. Moreover, being informed about proper flossing techniques can make a significant difference in maintaining gum health effectively.
Common Mistakes When Using a Flosser’s Pressure Settings

Many people make the mistake of ignoring the recommended pressure settings, which can cause discomfort or damage. You might also overlook your personal comfort, pushing the flosser too hard or too softly. Both errors can reduce the effectiveness of your flossing routine and even harm your gums. Adjusting pressure settings appropriately ensures a more effective and comfortable cleaning experience, preventing damage from excessive pressure. Understanding halal hygiene practices can also help you choose the right tools and techniques for your oral health routine. Being aware of proper pressure use can further improve your overall oral care and prevent unnecessary harm.
Ignoring Recommended Settings
Ignoring the recommended pressure settings can lead to ineffective cleaning or even damage your gums and teeth. Many users overlook the importance of proper pressure, influenced by dietary habits or myths about oral health. Using too high a setting may cause gum irritation, while too low might not remove plaque effectively.
| Pressure Level | Effect |
|---|---|
| Low | Insufficient cleaning |
| Moderate | Suitable for daily use |
| High | Risk of gum damage |
| Excessive | Causes trauma and discomfort |
Always follow the manufacturer’s guidelines to avoid damaging your gums or teeth. Remember, trusting oral health myths can lead to improper use. Adjust the pressure based on your comfort and dental needs for ideal results.
Overlooking Personal Comfort
While it’s easy to focus on selecting the right pressure setting, many users neglect to prioritize their personal comfort during use. Ignoring how the water pressure feels can lead to discomfort, making the experience unpleasant enough to discourage regular use. Your personal comfort should guide your choice of pressure levels, aligning with your preferences and sensitivity. Start with a lower setting if you’re unsure, then gradually increase until you find a balance that cleans effectively without causing pain or irritation. Remember, the goal is to maintain oral health without sacrificing comfort. By paying attention to how the pressure feels during use, you ensure a more pleasant and sustainable flossing routine, ultimately improving your overall oral hygiene.
Troubleshooting Pressure Issues and Maintaining Your Flosser
If you’re experiencing low or inconsistent pressure from your countertop flosser, troubleshooting can often resolve the issue quickly. First, check the water pressure supply—low household water pressure can affect performance. Ensure the water inlet is free of kinks or clogs, and clean any filters or nozzles regularly to maintain ideal flow. Also, examine the device’s durability; over time, mineral buildup or wear can weaken pressure. Power off and disconnect the flosser, then inspect and clean internal parts if necessary. Reassemble carefully and test the pressure. If problems persist, consider replacing worn-out parts or the entire unit. Proper maintenance not only restores consistent pressure but also extends your device’s lifespan, guaranteeing effective and comfortable flossing every time.
How to Find the Right Pressure for Your Teeth and Gums

Finding the right pressure setting on your countertop flosser is key to effective and comfortable cleaning. To protect your dental hygiene and oral health, start low and adjust gradually. Consider these steps:
- Test on a small area to gauge comfort.
- Increase pressure slowly until you feel effective plaque removal without discomfort.
- Pay attention to gum response; if gums bleed or feel tender, lower the pressure.
- Use the highest setting only if your gums and teeth tolerate it well.
Everyone’s teeth and gums are different, so adjusting your pressure guarantees a gentle yet thorough clean. Proper pressure helps maintain healthy gums and prevents damage, making your oral health routine more effective.
Tips for Safe and Effective Flossing With Your Countertop Flosser
Using your countertop flosser safely and effectively guarantees you get the best dental hygiene benefits without risking gum or tooth damage. Start with a low pressure setting and gradually increase as needed. Maintain a proper flossing technique by aiming the tip between teeth and along the gumline, not directly at the gums. Consistent, gentle pressure prevents irritation.
| Flossing Tip | Benefit |
|---|---|
| Use gentle, steady pressure | Protects gums and avoids injury |
| Target every tooth and gum line | Ensures thorough cleaning |
| Keep the tip moving smoothly | Prevents discomfort and damage |
| Follow a routine daily | Maintains ideal oral health |
Adopt these tips for safer, more effective flossing and better dental hygiene.
Frequently Asked Questions
Can Pressure Settings Impact the Longevity of My Countertop Flosser?
Yes, pressure settings can impact the longevity of your countertop flosser. When you adjust water flow to lower pressure, it reduces stress on internal components, enhancing pressure durability. Conversely, consistently using high pressure may cause wear and tear over time, shortening the device’s lifespan. You should regularly check and optimize pressure settings to guarantee your flosser operates smoothly and lasts longer.
Are Certain Pressure Levels Better for Braces or Dental Work?
Yes, certain pressure levels are better for braces or dental work. You should opt for braces-friendly pressure to avoid damaging brackets or wires, and use sensitive teeth settings if you have gum sensitivity or exposed roots. Lower pressure levels help protect your dental work while still cleaning effectively. Always start with the lowest setting and adjust as needed, and consult your dentist for personalized recommendations.
How Often Should I Change Pressure Settings During a Flossing Session?
You should adjust the pressure settings as needed during a flossing session, typically changing when you notice discomfort or if the pressure feels too strong. Keep an eye on your water reservoir and battery life, as frequent adjustments may cause more use. Start with a gentle setting, then increase if comfortable. Changing settings gradually guarantees effective cleaning without harming your gums or damaging the device.
Do Pressure Settings Affect the Noise Level of My Flosser?
Yes, pressure settings can affect the noise levels of your flosser. Higher pressure often results in louder operation, while lower pressure tends to be quieter. When you customize the pressure, you may notice a change in noise — dialing down pressure usually reduces noise, making your flossing experience more comfortable and less disruptive. Adjusting pressure not only benefits your gums but also helps you control the noise level during use.
Can Incorrect Pressure Damage Dental Restorations or Veneers?
You’re playing with fire if you set water pressure too high, risking dental damage, especially to restorations or veneers. Incorrect pressure can crack or dislodge delicate dental work, so it’s best to start low and gradually increase. Keep in mind, ideal water pressure protects your dental investments, preventing damage while ensuring effective cleaning. Always follow your dentist’s advice to avoid unintentionally causing harm with your countertop flosser.
Conclusion
Getting your pressure settings just right is like tuning a musical instrument—you want it to be perfectly in harmony with your gums. When you find that sweet spot, flossing becomes a gentle breeze rather than a harsh gust. So, don’t be afraid to experiment and listen to your teeth’s whispers. With the right pressure, your smile will shine brighter than ever, because a healthy mouth is the masterpiece you’re creating—one gentle, confident spray at a time.